
1:1 Scale Flux Capacitor Light Kit
This is a fantastic set for all the folks building full sized Back To The Future Flux Capacitor replicas. All of the wiring to the board has been done for you, making the set straight forward to install.
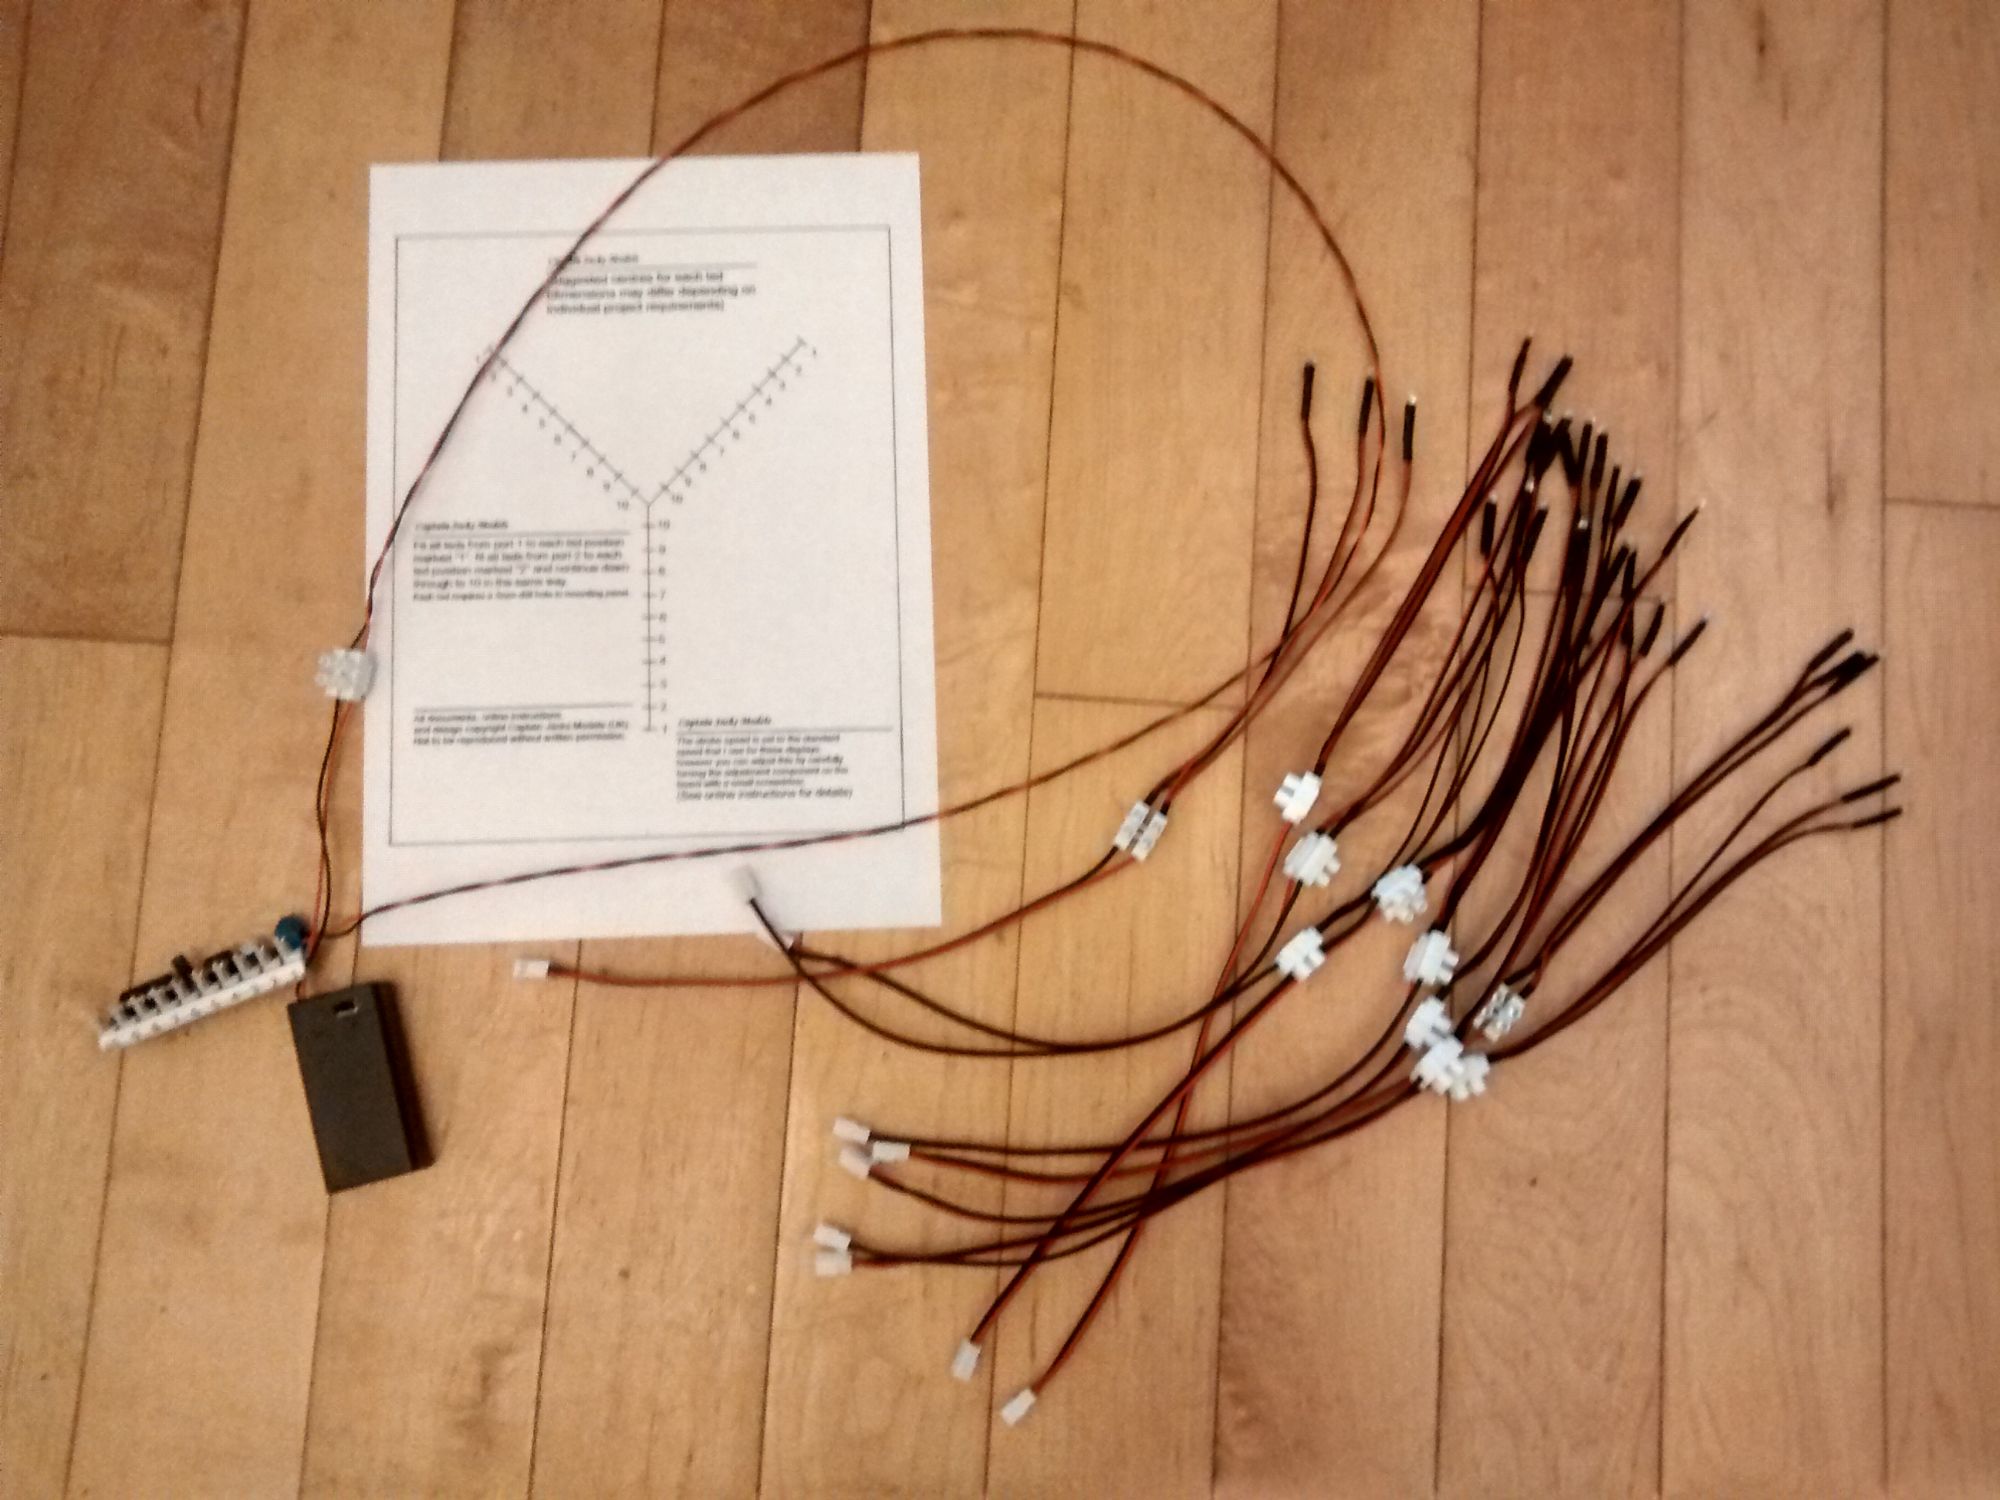
You'll find the following items in your light kit pack:
x1 Pre-soldered circuirt board.
x10 Blocks of three warm white leds, fully wired ready to be connected to the circuit board.
x1 LED layout template (this is the layout that I use myself when I make these - you can use your own layout as long as its within a similar dimension of A4 size.
Now you're ready to install the set:
Step 1
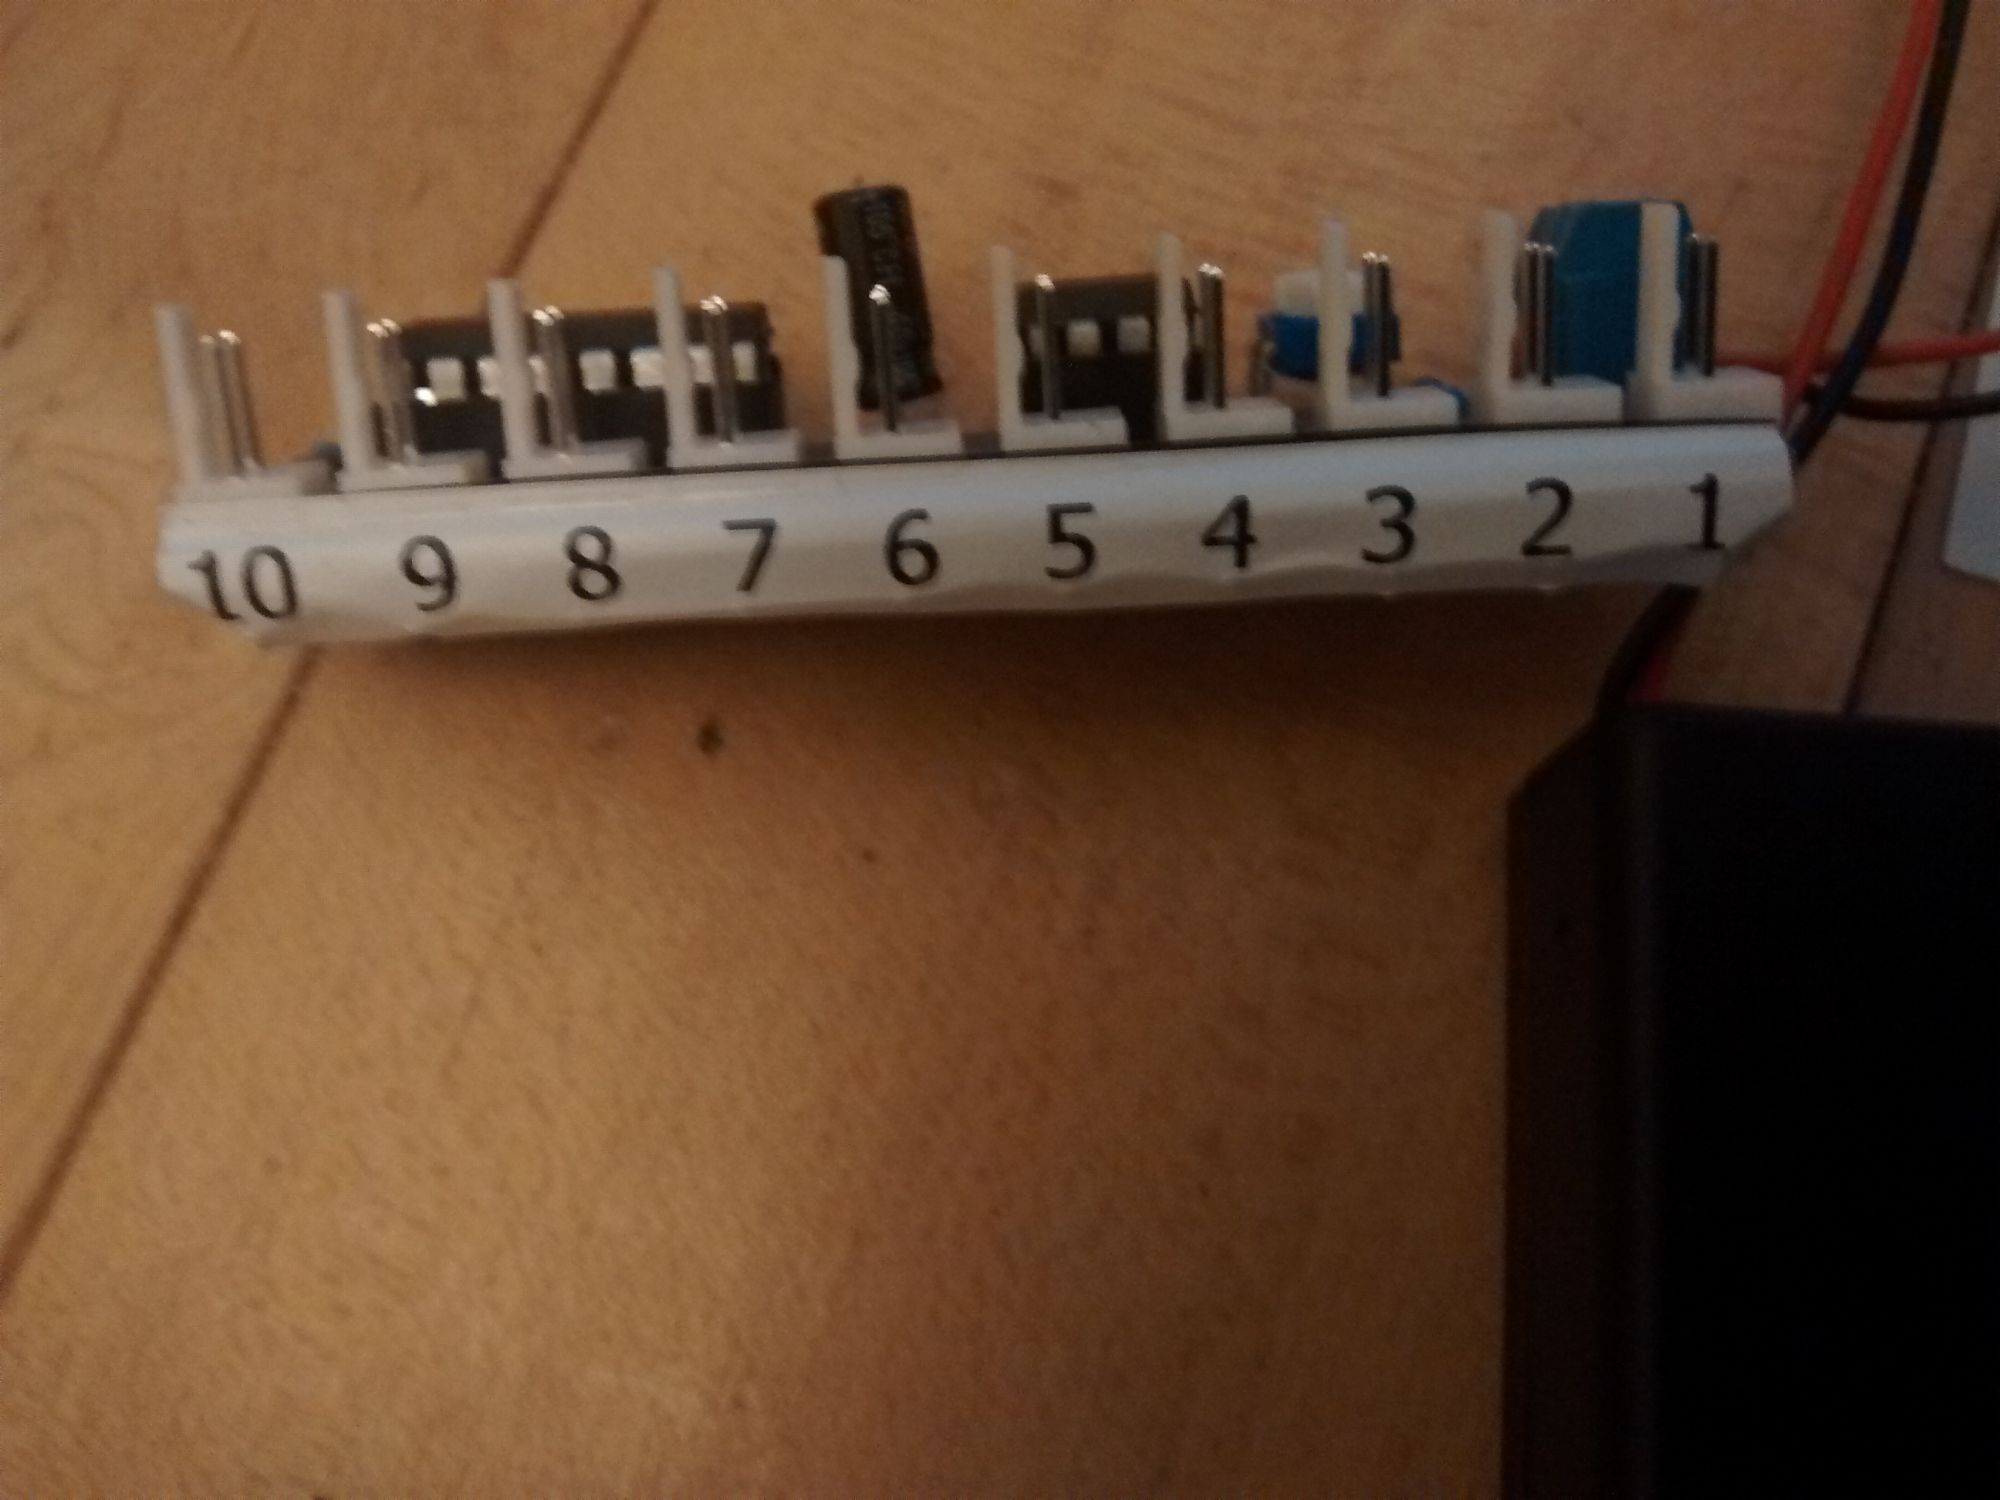
The ten bundles of LEDS are already fitted in the correct location on the circuit board.You will see that the ports on the board are numbered 1 to 10.
Step 2
Take the paper layout template and affix it into position on your led mounting board using tape. Each "arm" of the flux capacitor has ten numbered centres. Centre-punch each of these positions through the template onto your mounting board to show you where to drill the led holes. Remove the template and use a 3mm drill to carefully drill each led fitting hole.

Step 3
Now place your layout template next to the mounting board. As noted previously, each LED position is numbered 1 to 10. You now need to push the leds into position through the back of the board so that they flash in the correct order.
To do this, take the three leds running from Port 1 on the circuit board, and push them into the hole positions marked as "1" on the template. Continue placing the leds from Port 2 to the fitting positions marked as "2", right the way through until all thirty leds are in their correct position.

Step 4
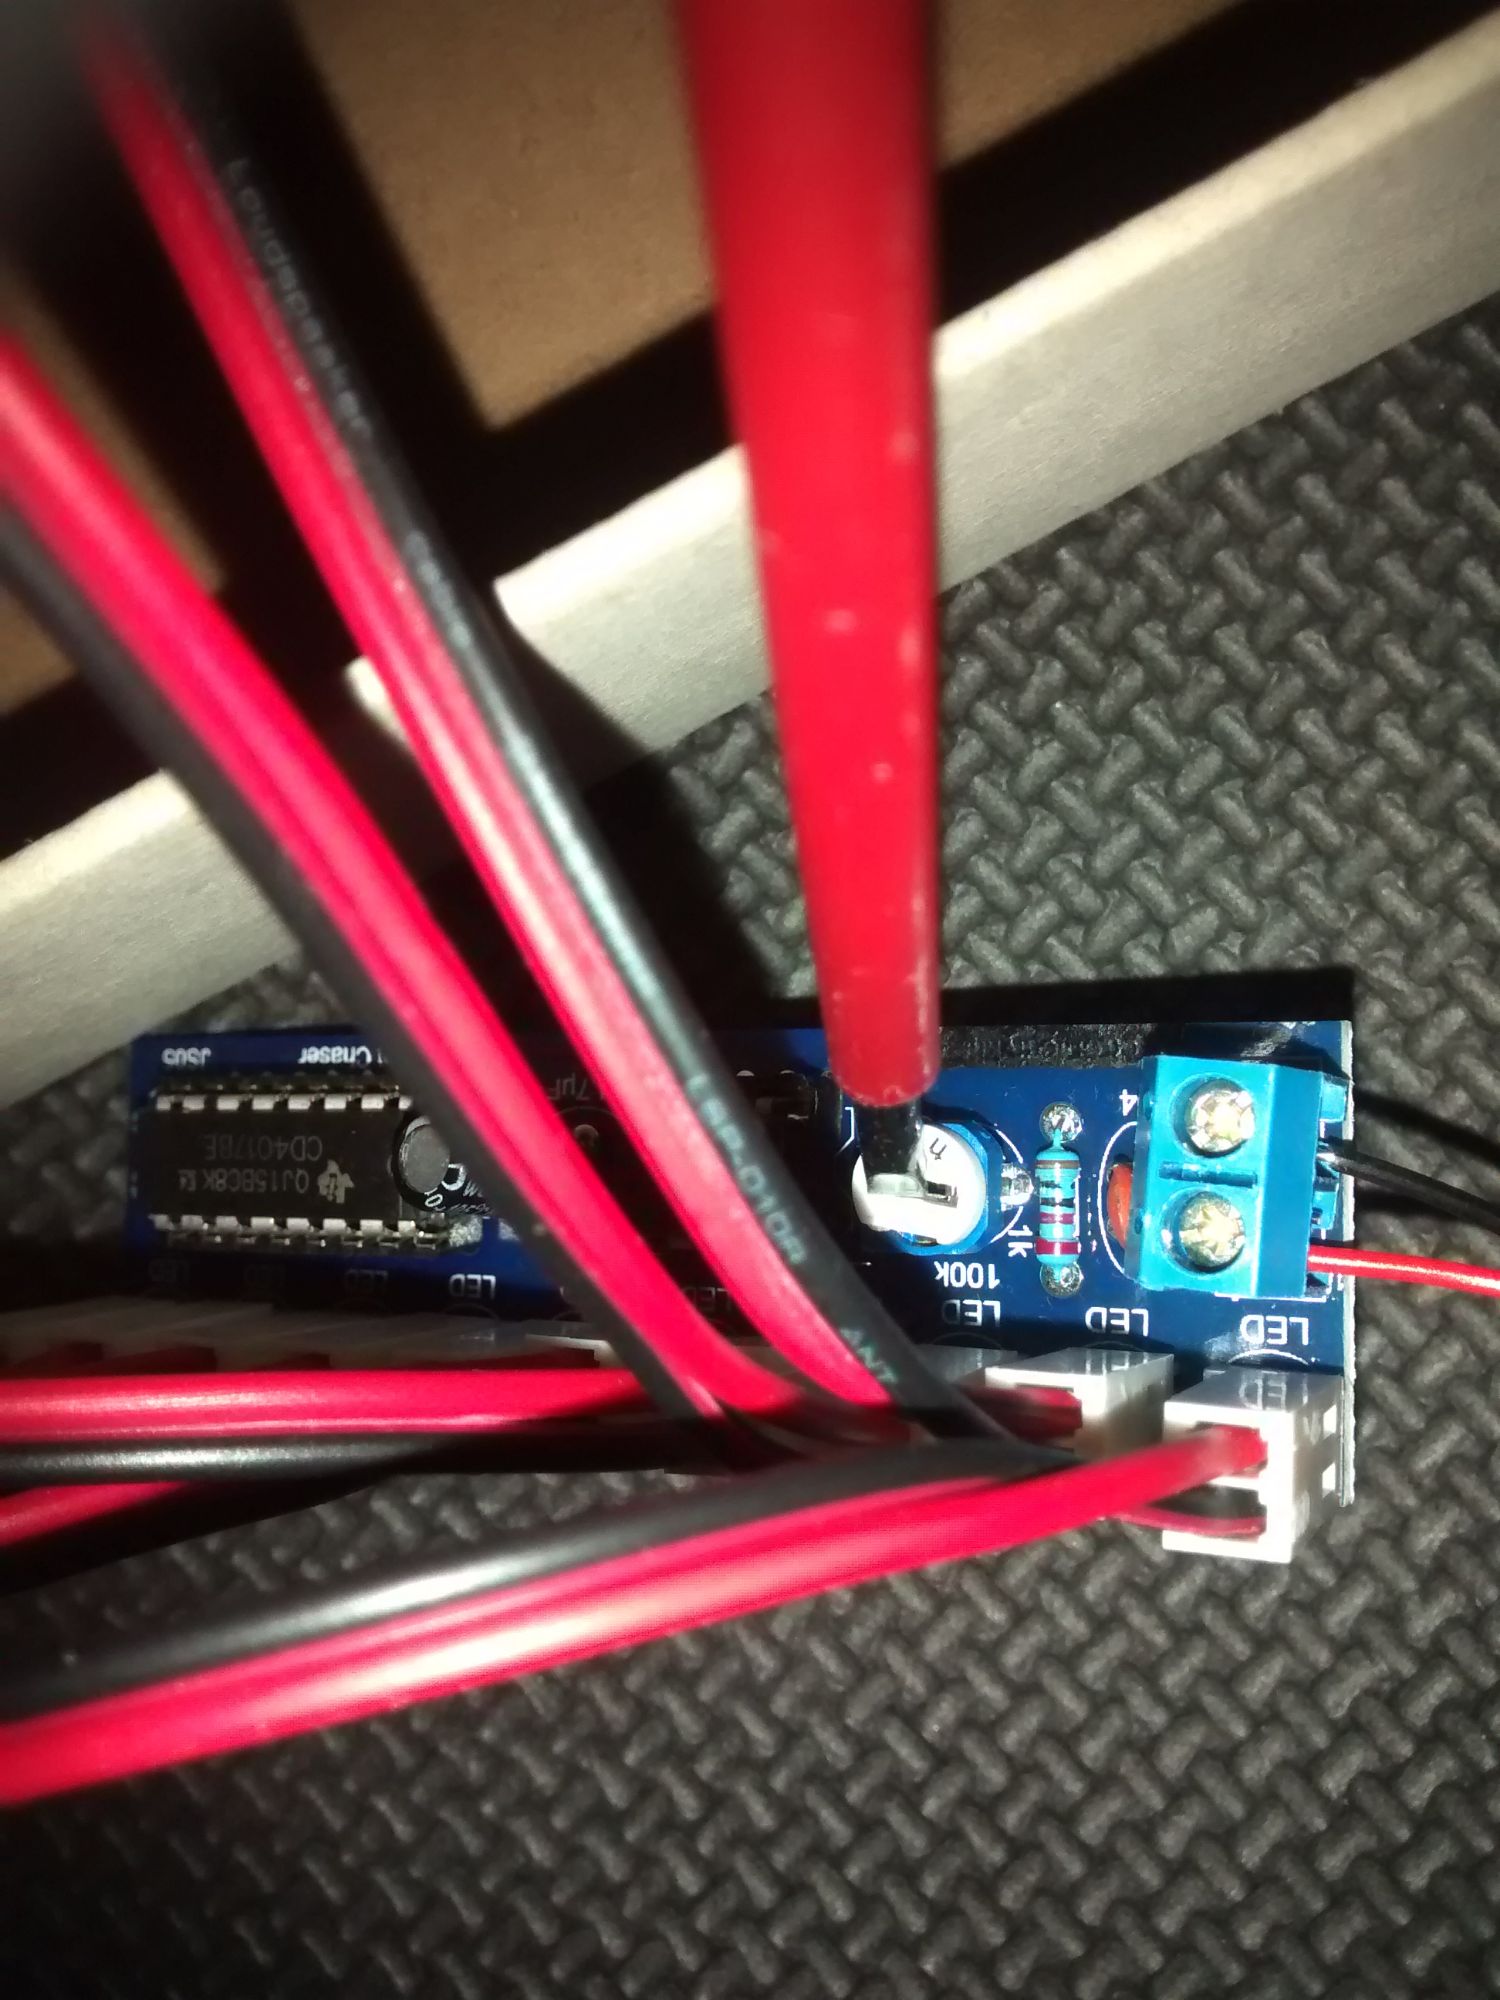
Insert the 9v battery and switch the set on. The lights have been set to flash at the rate that I normally use myself, but you can slow or speed up the rate to your own preference by gently turning the screw on the component shown either left or right with a screwdriver to change the speed.
You can see this set in operation on our Instagram page.
Thats it for the light kit! You can now continue to build your flux capacitor as required (hint: clear plastic tubing that has a slit down it is ideal for mounting over the leds).